This is copyright work — however you may post on another site ONLY if you post the article in it’s entirety, give credit to the author, AND post a reference link to this thread. If you can’t do that — then don’t post this work elsewhere.
BY Dave Schultz (The Old Hippie)
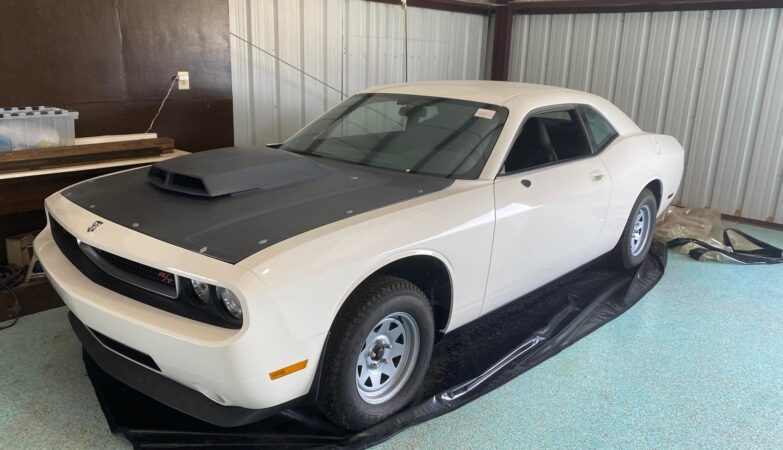
In this “White Paper” I will try to give a brief explanation of how they work, and how I went about replacing them on my five year old Stacker trailer with three 7,000# axles. I have about 110,000 miles on the trailer and the trailer sometime last year stopped having effective trailer brakes. I was getting a signal from the brake controller to the trailer, so I pulled the left side center hub and found the shoes had no lining left. I decided I would completely replace all six brake assemblies — keeping the drums, but replace the inner and our bearings, and use the higher temp red disc brake grease.

The following walk the reader through the process I took — along with photos.
First, and explanation of how electric brakes are in order.
In the towing vehicle there is a brake controller. The controller allows you to dial in the amount of voltage sent to the trailer’s brakes — based on the number of brakes and the weight in the trailer. Some of the newer controllers have a gyro in them that apply variable amounts of voltage based on the inertia of rig’s stopping. That’s to say that harder stops apply more voltage while slower stops apply less. The more common and less expensive has the driver setting the voltage — giving more voltage for more weight and number of braking wheels, to just below the point of locking up the brakes. A good starting point is usually the setting of 1 per braking axle.

The brake assembly is much like the old shoe/drum system, but with an electric magnet replacing the hydraulic wheel cylinder. In the case of my trailer with 7,000# axles — 12″ X 2″ shoes are typically used. A pair of shoes are about $25 and a replacement magnet is also about $25 per wheel. Since my trailer has high miles and I’ never close to home — I decided to take the route of buying the entire assemblies with not only the new shoes and magnets — but new backing plates and hardware. They’re set up and ready to go — and I paid about $85 per wheel on Amazon with free “Prime” delivery. There is a also a time savings of just R&R 5 bolts that hold the assembly onto the axle. There is a left and right side assembly.

I started by only doing one wheel first — to make sure that all of the parts fit before tearing into three wheels at a time. I choose the right center wheel. I’d recently bought new tires — and the knuckle heads cross threaded one of the lug nuts. So I had to run around looking for replacements. They’re 9/16 diameter with .690 knurl that are 2.5″ long — and don’t waste your time like I did trying auto parts stores — they won’t have the right ones. Head right to a trailer parts seller.
After setting the 2-man record for number of trailer blowouts more than 500 miles from home — I’ve learned to have (and carry) a large air pumped bottle jack. We always have a portable Honda generator and air compressor. You should also use a couple (three in my case) heavy duty jack stands. Also needed:
* Lug wrench or impact wrench
* Large screw driver and small deadblow hammer to loosen and remove dust cap
* Needle-nose pliers if there is a cotter pin holding bearing nut — or the large screw driver if a clip
* Large Cresant wrench for the bearing nut
* Lots of shop towels
* Grease (cant mix red with black, red with green, or black with green)
* Wire cutter/stripper and connectors
* Replacement parts
In my case I also replaced the bearings. I will clean and pack in grease the better ones to put in my trailer spare parts bin — along with the best pair of brake assemblies — in case I have to make a repair on the road.

As previously stated — I had to break a stud with a cross threaded nut to get the wheel off. Actually happier finding it now — rather on the side of the road. The stud was broken with a lot of grunt and a long breaker bar.
I usually like to push and pull on the drum after the tire is off to get an idea of the bearing condition based on the play and feel of the play.
The drums are held on much like a car’s front drum. Take a small dead blow to give the dust cover a soft rap to where you can then get a large screw driver in to pry off. They dent easily — so use a couple soft wraps rather than a hard one.
Behind the dust cover is a bearing retainer nut held in place with a retainer clip that can be carefully pried off with a screw driver. You might have a Castle nut help in place with a cotter pin instead. Once you get whatever is retaining the nut from backing out — the nut should be only finger tight. Remove it, pull the drum toward you just a little than push back to pull off the outer bearing. You don’t want to drop the bearing to the ground if you’re going to reuse. I put the retainer, nut washer, and bearing in the dust cap. Once you have the outer bearing, pull the drum off and put somewhere that dirt wont get kicked into the grease.

At this point — I usually wipe all of the excess grease off the part I put in the dust cap — and the dust cap — and set in the parts washer to soak a little while I replace the brake assembly.

I replace the bearings (again keeping a cleaned and repacked set in a baggie for a spare) — but if you don’t you need to make a decision on if you want to clean and repack with higher temp red grease, or just say screw it and do nothing with them. If you change from black to red — you need to completely clean all of the black grease from hub, drum and bearings and greases don’t mix.

In my situation — I was very surprised to see that the shoes weren’t that bad on the right side — when the left center had no lining left. WHen I later pulled the other two wheels on the right side — they too had minimal wear. I’m going to assume that these bare wires going through the backing plate rendered the right side useless at some point — and I only had left brakes until they wore out. When I get the the left side — I’ll post photos.
I squirted a little WD40 on the five nuts holding the brake assembly on — and removed them. I also removed all grease off the spindle, cleaned with compressed air and liberally sprayed with brake cleaner. We use a lot of brake cleaner at our shop — and about 3 times a year O’Reileys sells it for $1.99 a can (usually $3.99) if you buy by the case. It is on sale today and I picked up another 3 cases.

I then bolted on the new assembly

Again there is a left and a right side


I used a punch and 1 pounder to bang out the broken stud from the front, then bang a new one through the back. I could have used the press — but this worked just as well. I then pulled the rear seal and bearing and cleaned out all of the black grease. I sprayed and wiped the inside of the drum with brake clean, and did the same with the machined area of the drum. I packed the inner bearing with red grease, slopped a little more on it, and installed with seal flush to the back of the drum.
I installed the drum back onto the spindle, installed the packed outer bearing and washer, replaced the nut to tight — then backed off one nut corner to make finger tight after ensuring drum was fully engaged, and then the retainer. I then started pumping red grease into the Bearing Buddy fitting while spinning the drum until a saw grease just start to come through the outer bearing — and then put the dust cap on with a couple soft blows with a small dead blow hammer.

again — when I pulled the other two drums the shoes where in good shape — telling me that there was an electrical problem, early on with the right side.
I hope this helps someone better understand how to check their brakes and bearings and maintain them properly.
After the wires are connected and the other two wheels and completed — we’ll ensure the hubs don’t turn with the truck running and brakes applied — and do turn when brakes are applied. Then replace tires in a rotated position, and on to the other side. After all six wheels are done — I take for a 25 mile ride and then squeeze a little more grease into the bearing buddies.
Good time to mention that a wheel bearing problem on the road is a royal PITA — and can result in a fire before you even realize that the trailer had the failure. This most often occurs from trailers sitting for a long time and grease drying up. Good to take trailer for frequent rides and keep the grease fresh. Check the bearings by jacking a side in the air and push pull toward you the wheel to see if there’s too much play. Almost any play will be too much.